Showing posts with label kids. Show all posts

Monday, December 20, 2010

Making Christmas #3: Toy Car Tote

I was clicking through the internet one day and saw a little tote for toy cars, with pockets for the cars on one side, and a play area on the other side, that folded up and had a carrying handle. I loved the idea, and after weeks of thinking it would require much more than my feeble sewing skills, I had found enough courage to try it. So of course I couldn't find the web site again. After hours of fruitless googling, I figured that there were a few design features I hadn't been crazy about, anyway, so I would (as usual) just make up my own pattern and (of course) just wing it. And here is my version of a toy-car tote - nowhere near as cool as the original that inspired it, but super-simple to make, small and portable and enough to keep that certain little boy entertained on the go. Enjoy!

This is how to make the toy car tote I made for my nephew, out of an old shirt. First, find an old cotton shirt, or some sort of leftover fabric. I chose the shirt because it was a slightly heavier, durable cotton, but you could use any type of fabric, I suppose. This was a women's large, and I had more than enough fabric.
Next - measure and cut your fabric. I just pinned an 8 1/2" x 11" piece of craft felt to the shirt, and cut around the edge through both layers of the shirt to get 2 pieces of fabric. Easy peasy lemon squeezy. The cat even helped out.
Now you will add your "road". Pin it 2" in from one short edge on the right side of one of the pieces of fabric. You will notice I forgot to embroider the yellow lines on the road before I sewed it on - it is not fun trying to embroider them on afterwards, so if you want them take care of it before this step!
Pin one end of your elastic, and use your cars to see where you need sew down in between, like so. First one car, pin to mark it,


Then the next car, pinning to mark, and so on.

I found that 5 cars fit well on this size fabric.
Sew next to your pinned markers, going back and forth a few times to make sure the elastic is secure. Make sure you sew the edges, too. Turn your piece and sew the long edges of the "road" to your fabric.
I also neglected to put on a handle at this step, when it would have been easiest. If you have a piece of nylon webbing, that would work great as a handle. Pin one piece to the bottom, with the handle part pointing towards the center of the carrier. I know it seem counter-intuitive, but it works. Promise. Lay your two pieces of fabric right sides together, with the handle sandwiched in between, and sew down one side, along the bottom, and up the next side. Reach in, grab the handle, and turn. Ta-daa!
After that, raid your recycling bin for an old cereal or cracker box near the same size, and cut it as shown. Since I was using paper sized fabric, I just cut the front of the box to 7 x 3, 7x3, and 7 x 1-1/2.
Maybe there is an easier way to do this, but I don't know how, so this is what I did - put one piece of cardboard in to the bottom of the "bag" you made, between the two layers of fabric. Leave a small allowance so that you don't sew through the cardboard, and sew across. Insert the 7" X 1-1/2" piece of cardboard, leave a small allowance, and sew across. Add the final piece of cardboard, your second handle if you're using handles (the ends tucked in between the fabric pieces with the handle part out and pointed toward you), and fold the ends under. Pin and topstitch across to seal it shut. Sew on a button to keep it closed when it's folded up, and yay! Done! Fill it with cars and give to your favorite little boy!

Wednesday, December 01, 2010

Making Christmas #2 : Crafty Christmas

I made a plethora of crafty gifts for my favorite people last Christmas. These are just the ones I remembered to take pictures of.
First up, we have these adorable covered barrettes from Angry Chicken's tutorial, and soft knit curlers inspired by these. They are both for my Niece 2- whom, DearSis informed me, gets along amazingly well with her sisters when they play beauty shop.
Niece 3, who is usually the customer at 2's beauty shop, already has perfect Shirley Temple curls - but what the heck, it's just to play with, right?
The barrettes are great for wispy little girl hair, and really cute (although the tutorial ones are way more adorable than my hand-sewn versions), and I'm making myself some of the soft curlers - hopefully using them will eliminate the foul memories I have of when I would get my hair did as a kid- I still occasionally have flash backs of trying to fall asleep with those nasty curlers with the brushes inside poking my head, and the pink plastic picks that always seemed to dig in deeper the more you tried to get comfortable. Ugh.

I didn't really write a pattern, but here's a quick summary of how I knit the curlers. They're a lot of fun to make, quick knits that I mostly worked on while watching TV with DearHubs at night.

Knit Curlers

  1. With any weight yarn, and double-pointed needles approximately 2 sizes too small for the yarn you are using, cast on six stitches.
  2. Knit 4 rows.
  3. Knit 2 stitches, bind off two stitches, knit last two stitches. Turn.
  4. Knit two stitches, cast on two stitches, knit last two stitches. Buttonhole made. Turn.
  5. Knit across.
  6. K2tog across - You will now have 3 stitches on your needle.
  7. Knit i-cord for as long as you would like ( I tried to keep it about 2 inches for my small curlers, but you could of course go longer for larger ones), keeping track of how many rounds you knit.
  8. When you have reached the desired length, begin increases.
  9. Kfb in each stitch for 2 rounds - you should now have 12 stitches, divided onto at least three needles.
  10. Knit around for the same number of rounds as your i-cord.
  11. Stuff curler with small amount of batting or fiber-fill, enough for it to be firm but not so much that the stitches stretch out. (Seriously, you only need the tiniest bit of batting for each curler. I shoved mine in with a knitting needle.)
  12. Begin reducing - k3tog first round (6 stitches left), k2tog next round (3 stitches left). (If you're going to be using a button on the end, go straight to step fourteen and fifteen, and then just use the leftover yarn to sew on your button if possible. If not, weave in your ends, sew on your button and voila! You're done! Go curl your hair! If you're making this for children, like I was, continue as written, with the i-cord knot at the end rather than the choking hazards also known as buttons.)
  13. Begin i-cord - you're going to want at least an inch.
  14. Leaving stitches on needles, cut your yarn, leaving a decent tail (at least two inches)
  15. With tail, thread a yarn needle and pull yarn through each stitch, sliding the stitch off the needles as you go. Pull yarn tightly and knot.
  16. Now, use the tail of the yarn to help you knot the smaller i-cord at the end of the curler, clipping excess once you're done.
There you go! Now rinse and repeat, until you have a headful of these things.

This 'pattern' is so easy to customize - for bigger curlers, use heavier yarn and bigger needles; for longer ones, knit more rows; you get the idea. I like the fact that you can make these to suit yourself, rather than trying to force your head to work with the generic one-size ready-made store-bought plastic scratchy ouchy blech. Have little wispy hairs? Make a few little teeny curlers. Thick, heavy hair? Jumbo curlers it is (although you may want to wait until your hair is already mostly dry before using these - experience speaking!)

Wednesday, September 15, 2010

The Misadventures of the Sweatshirt Pillow

I hate to just put stuff in a box and store it. I think that the things that are special to us should be out and used. My kiddos have a few items of clothing that are really special to them, and I am always trying to think of ways to reuse the really special ones and keep them around as long as possible. Although I'm not averse to a T-shirt quilt, I hadn't quite gotten up the courage to attempt a full-size quilt - little bite-sized projects are much more my speed - so I thought that this would be a fun way to keep Thing 1's Phillies sweatshirt (from the first game he and DH went to, when he was a wee boy of only 5!) around and useful. This isn't really a tutorial though, more like showing what can go wrong, going wrong.


What I learned from this project:
Sports memorabilia is a rip-off. This thing was so badly made it almost ruined the project, and I'm pretty sure DH paid almost $30 for it at the stadium. Grrr...

I was originally going to sew the armholes and neck closed and make a case for this small pillow Thing 1 likes to keep on his bed. But, as I planned the project, I noticed that:
  • The logo was not centered on the sweatshirt
  • The logo was too close to the neck for me to be able to sew the neck closed
  • DH paid way too much for this p.o.s.

So, I had to improvise. I like improvising, so I was okay with that. I decided I would cut the seams out (faster than picking them) and use any excess fabric to sort of wrap around, under the neck, thereby closing off the neck hole and preserving the logo. Which is, of course, what DH paid $30 for when he bought the stinking thing.
Well, then I ran into another problem - the shirt was made for a child, so there wasn't much extra fabric where I needed it, and sewing around a stretchy circle (neck) was a bit above my skill set at the time. So, I decided to sew a square salvaged from the sleeves underneath the neck hole, and sew the sides together and be done with the darn thing. So, I cut off the sleeves and that's when I saw this:


The shoulder seams weren't straight at all! When I lined them up straight, the sides were crooked. When I lined up the sides, the shoulders were crooked! I almost cried. This had started out as a quick, easy project to finish before Thing 1 got home from school, and was shaping up to be impossible - and I had already cut apart his favorite sweatshirt. Sure, it was too small, but it was still his favorite.
Well, I managed. I had to cut out the shoulder seams and deal with the logo being off-center, but it was done and on the bed when Thing 1 got home from school that day. Barely. But he doesn't notice all the things that make me nuts about it, and when he gets tired of using the ratty old pillow inside it, I can just stuff it and sew it shut. Or maybe by then I'll have decided to tackle that T-shirt quilt.

Wednesday, September 01, 2010

Impermanence, And The Persistence of Memory

Well, as another school year starts, I came across this short piece that I wrote a few years ago. It still rings true for me, so I thought I'd share.

Today, Thing2 graduated from kindergarten. I used to think that kindergarten graduations were kind of silly and pointless - I mean, who doesn't graduate from kindergarten? You might get held back in first grade, you might drop out of school or fail classes and never graduate high school, but everyone gets through kindergarten, right?
But honestly, as I felt the pride of seeing Thing1 graduate three years ago, and again as I was watching the kids today in their paper hats, earnestly performing painstakingly memorized songs in low, stage-fright voices, it hit me that the graduation is really for the kids sake. It's a way of telling them without telling them that now their lives are never going to be the same. School is no longer going to be about tying your shoes and singing your ABC's, about sharing your crayons and having recess and snack time. From here on out, it starts to be work. You can still have fun, but that's just a benefit or a side effect, not a goal.
I was struck when one of the teachers mentioned that the kids would be graduating high school twelve years from now. Twelve years does not seem to be as long as it did ten years ago. Or fifteen years ago. Twelve years is an eye-blink, a nap, an afternoon with the kids away. I tried, but couldn't imagine, my kindergarten graduate in a cap and gown. But then again, when he was three, I couldn't imagine him being almost seven and graduating kindergarten, eager for the 'real learning' of first grade. Every age seems like the only age the boys will ever be, until I am shocked into realizing that they have grown up again.
My memory is terrible, which is one of the reasons I originally began writing - I started my first journal in fifth grade, I think; sometimes it seems like the only way to keep that moment and my impressions of it fixed in my mind for more than a few days or weeks or months. It provides me with a record to refer to, so that when my reality changes I can look back and say, this is what my world used to be. I wish I had had more time when they were little to write down what things where like, all of the little things they did and said that made up the hills and valleys of my days then. Now, all I have left of those days is a few tattered memories floating in my head, and a few often-told stories that have already acquired the impersonality of legends. I keep encouraging myself, trying to improve my memory by saying "This is something special that you will remember, the way he talks right now, the little lisp, the gaps in his smile" but I won't know if it works until years later, when I try to remember this fleeting moment...
Anyway, the point of this was that the graduation is a marker, a way to memorialize this transition of our children from our babies to big kids. For them, it's a thrill and exciting and maybe a little scary... for me, I just hug him tight and try to hold on to what he looked when he was three, dancing under the cherry trees.

Wednesday, April 22, 2009

Happy Earth Day!

Earth Day is such an important holiday, in my oh-so-humble opinion, and, as I just learned, is also the 3rd 'craftiest' holiday after Christmas and Halloween. It must be from all those milk-carton bird feeders and soda bottle maracas, right?
I feel terrible that I have not been very crafty lately... Christmas seems to have sapped all of my creativity for the last few months, and I am just now starting to get the urge to make things again, which I've been trying to channel that into finishing up some (previously put-on-hold-indefinitely) projects around the house, cooking, and starting a garden with the kids.
This doesn't leave a lot of time for doing much knitting, or for much crocheting either. I've started a couple of things, but haven't had any motivation to finish anything. :(
It's really a shame, because I lucked into some amazing yarns on Freecycle that have been calling my name for the last two months, but I've felt so guilty about all of my UFO's that I haven't dared to start anything new with them. Siiiggghhh.....
I am going to knit a couple of bags to hold the wheels and such for the Heelys that DH's mom bought for Thing 1 and Thing 2, though, which should be a gratifying, quick project. In the meantime, here are a few pictures of past accomplishments for my imaginary audience's viewing pleasure.


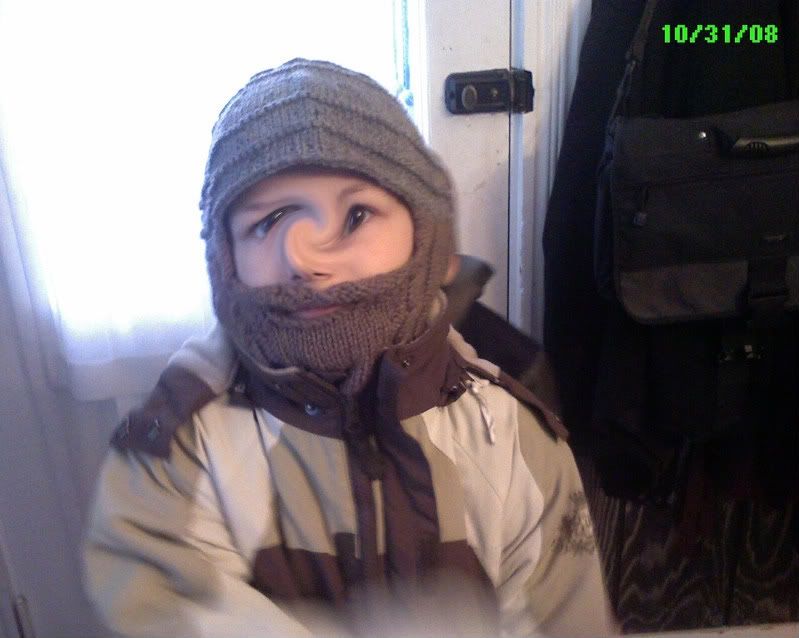
This is the bearded hat I made for Thing 1 for crazy hat day, aka Halloween. I had to talk him into wanting it, but now he loves it.


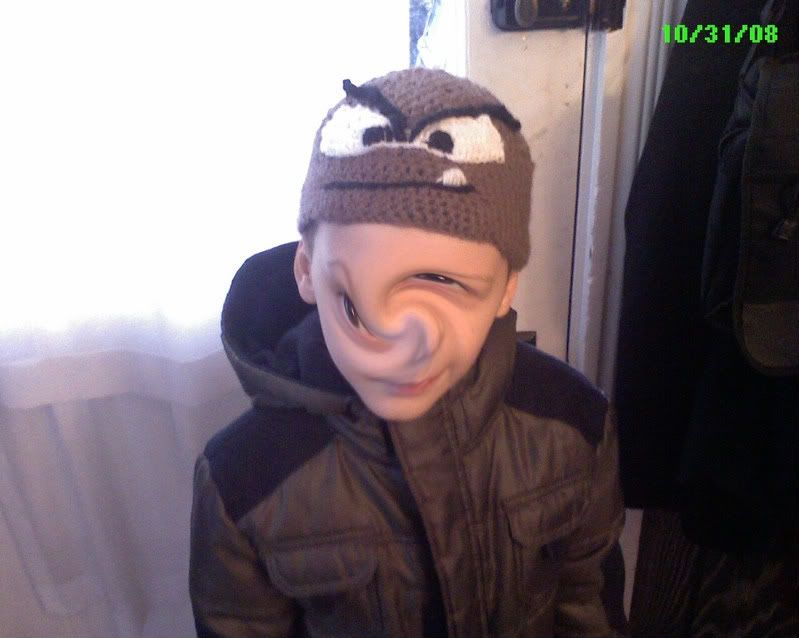
And, also for crazy hat day, this one was finished as the kids were eating breakfast that morning, a crocheted Goomba hat for Thing 2; he loves all things Super Mario. It's a little too small for him, but he wears it anyway. What a kid.
Hopefully, I will have some more stuff to show off soon - not my house projects, though... I forgot to take pictures. Bad blogger, no biscuit....

Tuesday, November 04, 2008

Trinity's Top


OK, I made this for my niece (and wrote the pattern) about 3 years ago, so pleasepleaseplease, imaginary readers, excuse the terrible pattern writing. etc. The size is about a 5t. I think it only used 2 balls of Sugar n Cream. If you find any errors or have suggestions, please feel free to comment below. Thanks.
eta: Trinity is super petite, so these sizes probably run small.

Trinity’s Top
Size 3T (4T,5T)
Materials:US7 straight or circular needles
Size H crochet hook
1 (2, 2) balls Lily Sugar n Cream worsted weight yarn -100% cotton (I used ecru)

Gauge:5st=1 in, 6rows=1 in

Notes: all inc are k in front and back of st. YIF is slip sts with “yarn in front” - Hold it there a little loosely, it will tighten up quite a bit when you make the bows.
The top that I made was actually a little shorter than I had intended, if you want to make it longer, add a patt repeat (or half a repeat - only 5 rows) to the bottom before BO - but I suggest having another ball of yarn handy just in case you need it.

Bodice-3T
Cast on 5 st
Row 1: k2, p1, k2
Row 2: k2, inc next st, k2 - 6 st
Row 3: k2, p2, k2
Row 4: k2, inc next 2 st, k2 - 8 st
Row 5: k2, p4, k2
Row 6: k2, inc next st, k2, inc next st, k2- 10 st
Row 7: k2, p6, k2
Bodice -4T( 5T) CO 8(10) st.
Row 1: k2, p4(6), k2
Row2: k2, inc in 1st st, k 2(4), inc next st, k2 - 10(12)st
Row 3: k2, p6 ( 8 ), k2
Row 4: k2, inc next st, k4(6), inc next st, k2 - 12(14) st

By now, you should have a small area of stockinette st and an emerging garter st border. All WS (odd numbered) rows should be worked as *K2, p (#of st to garter stitch edge), K2*. All RS (even numbered) rows should knit all st, increasing the third and third from last st, until you have 22 (24, 26) st on your needle. BO.

Make another triangle in the same manner as above. When you have finished the second triangle, cast on 5 st, then pick up 40 st spaced evenly across the bottom of both triangles on the RS. CO another 5 st. Turn to the WS, and begin waist band.

Waist band
Row 1: p across (wrong side)
Row 2: k across
Row 3: k across
Row 4: k across
Row 5: p across
Row 6: k across
Row 7: k across
Row 8: k across

Bottom
There are 50st on your needle now. The first and last 5 will be worked in garter st. So -
St Pattern is a variation of little butterfly worked in multiples of 10 over 10 rows, and will be worked over 40 sts, 20 rows

Row 1: k10,*sl 5 WYIF, k5*, repeat from * to last 5,k5
Row 2: k5, Purl across until last 5. K5.
Row 3: Rep row 1
Row 4: Rep row 2
Row 5: k5, [k7, insert tip of needle under both yif’s, k 1- being careful to draw st around yif’s, K2], repeat across until last 5st, k5

Row 6: K5, *sl 5 wyif, k5*, repeat from * to last 5, k5.
Row 7: K5, Purl until last 5 ,st, k5.
Row 8: Rep row 6
Row 9: rep row 7
Row 10: K5[K2, insert tip of needle under yif’s, k1, making sure to draw st around yif’s, k7], repeat until last 5, k5.
Work pattern two times total (3 times for a longer top) , finish with picot bind-off below.

Finishing :
Picot bind off (thanks to Marnie MacLean for showing me how!)
This will create the ruffle at the bottom, just do a regular bind off if you don’t want the ruffle

K2, pass 1st k st over 2nd k st, *place remaining st back on right needle, CO3, BO4, k1, pass st already on needle over new st*, rep from * until only 1 st is on needle, cut yarn, pull through remaining st, weave in tail.

Straps: Make one at the top of each bodice triangle and at either end of waist band

pick up 5 st.
Row 1: k all
Row 2: k2tog in back of st, k1, k2tog
Row 3: sl1, k 1, psso, sl last st, psso
With crochet hook, pick up last st on needle and chain st for app 6-8 in. Cut yarn, pull through last st tightly. Weave in all ends, block.

Give to your favorite little girl, and enjoy!

Friday, August 22, 2008

School is NOT out forever!!

No matter what Alice Cooper tells your children, it's not true.
And so begins another school year. Since I have only two kids, it was a very short jump between sending my first one off to school and sending my last one off to school... and I have reached that very emotional, empty-nest point. #2 is starting Kindergarten, and I have to admit, I'm having a bit of a breakdown.
I'm trying to be excited, because he is, and I don't want to dampen that any, but I'll probably cry. Thank goodness he goes in the morning, I can drown my sorrows in coffee and have myself all put back together by the time he gets home.
Well, back to school time is just as hectic and stressful for the parents as the kids, so off I go - between sorting clothes to see how bad the latest growth spurts are going to affect the budget, buying school supplies, trying to set up my Ravelry account and knit some gifts for a baby shower next month, I'm swamped. (Not really. I just need to get off the computer and make dinner. The children need to eat in order to fuel the next growth spurt, you know!)
More soon, with some pictures, too!!