Showing posts with label knitting. Show all posts

Wednesday, December 01, 2010

Making Christmas #2 : Crafty Christmas

I made a plethora of crafty gifts for my favorite people last Christmas. These are just the ones I remembered to take pictures of.
First up, we have these adorable covered barrettes from Angry Chicken's tutorial, and soft knit curlers inspired by these. They are both for my Niece 2- whom, DearSis informed me, gets along amazingly well with her sisters when they play beauty shop.
Niece 3, who is usually the customer at 2's beauty shop, already has perfect Shirley Temple curls - but what the heck, it's just to play with, right?
The barrettes are great for wispy little girl hair, and really cute (although the tutorial ones are way more adorable than my hand-sewn versions), and I'm making myself some of the soft curlers - hopefully using them will eliminate the foul memories I have of when I would get my hair did as a kid- I still occasionally have flash backs of trying to fall asleep with those nasty curlers with the brushes inside poking my head, and the pink plastic picks that always seemed to dig in deeper the more you tried to get comfortable. Ugh.

I didn't really write a pattern, but here's a quick summary of how I knit the curlers. They're a lot of fun to make, quick knits that I mostly worked on while watching TV with DearHubs at night.

Knit Curlers

  1. With any weight yarn, and double-pointed needles approximately 2 sizes too small for the yarn you are using, cast on six stitches.
  2. Knit 4 rows.
  3. Knit 2 stitches, bind off two stitches, knit last two stitches. Turn.
  4. Knit two stitches, cast on two stitches, knit last two stitches. Buttonhole made. Turn.
  5. Knit across.
  6. K2tog across - You will now have 3 stitches on your needle.
  7. Knit i-cord for as long as you would like ( I tried to keep it about 2 inches for my small curlers, but you could of course go longer for larger ones), keeping track of how many rounds you knit.
  8. When you have reached the desired length, begin increases.
  9. Kfb in each stitch for 2 rounds - you should now have 12 stitches, divided onto at least three needles.
  10. Knit around for the same number of rounds as your i-cord.
  11. Stuff curler with small amount of batting or fiber-fill, enough for it to be firm but not so much that the stitches stretch out. (Seriously, you only need the tiniest bit of batting for each curler. I shoved mine in with a knitting needle.)
  12. Begin reducing - k3tog first round (6 stitches left), k2tog next round (3 stitches left). (If you're going to be using a button on the end, go straight to step fourteen and fifteen, and then just use the leftover yarn to sew on your button if possible. If not, weave in your ends, sew on your button and voila! You're done! Go curl your hair! If you're making this for children, like I was, continue as written, with the i-cord knot at the end rather than the choking hazards also known as buttons.)
  13. Begin i-cord - you're going to want at least an inch.
  14. Leaving stitches on needles, cut your yarn, leaving a decent tail (at least two inches)
  15. With tail, thread a yarn needle and pull yarn through each stitch, sliding the stitch off the needles as you go. Pull yarn tightly and knot.
  16. Now, use the tail of the yarn to help you knot the smaller i-cord at the end of the curler, clipping excess once you're done.
There you go! Now rinse and repeat, until you have a headful of these things.

This 'pattern' is so easy to customize - for bigger curlers, use heavier yarn and bigger needles; for longer ones, knit more rows; you get the idea. I like the fact that you can make these to suit yourself, rather than trying to force your head to work with the generic one-size ready-made store-bought plastic scratchy ouchy blech. Have little wispy hairs? Make a few little teeny curlers. Thick, heavy hair? Jumbo curlers it is (although you may want to wait until your hair is already mostly dry before using these - experience speaking!)
Wednesday, July 01, 2009

No More Nemesis

Okay, so the guy wasn't really a nemesis, but still... he had a way of pissing people off. On purpose. He was one of those kind of guys who can't resist pushing just to see how far he could before someone would push back- and then once they started pushing back, he would promptly (and figuratively, of course) kick their ass.
I am one of those nicey people who just doesn't like to say bad things about others, so Steven Wells was pretty much my polar opposite. I first became aware of him because of these two articles he wrote about how knitting is completely not as cool as hipster knitters think it is.
Now, I have been crocheting since I was 17 and more recently started knitting, but before the apex of the trend really hit. I was kind of glad to finally see it being promoted as a punk-rock, hip type of hobby- considering that even my loving DH constantly referred to me as 'Granny' when he would see me knitting something (didn't stop him from enjoying the blanket I crocheted for him, but that's beside the point), I thought it was about time that crafting became kind of cool. There's nothing wrong with preferring to wear or use something you've made by hand, rather than using or wearing something that an underpaid worker in Guatemala made with a machine. I also enjoyed the fact that all kinds of people were interested in knitting and crocheting and crafting - from granola crunchers to dominatrices, there was something for everyone in the knitting world, it was no longer just doilies and cardigans.
Well, Steven Wells set me straight. He let me know that no matter what kind of gloss you put on it, no matter what you were knitting or crocheting, it was still not edgy or punk rock. After my initial pissiness, after composing comments in my head that I would never repeat (or type), I just had to laugh. I read a few of his back articles, and was hooked. He just seemed to be one of those people who can't help but tell the truth the way he saw it, everybody's pwecious widdle feewings be damned. Plus, he was hilarious. Since I can take a joke, even if it's on me, I immediately subscribed to Philadelphia Weekly.
Then, the Anticraft replied to his criticisms by posting these wonderful Vlad the Impaler hats. I literally laughed out loud when I saw the quote by Steven Wells at the top of the page. I thought, "Hey, that's a good idea, turn that anger toward creative pursuits, you've shown him." I continued to thoroughly enjoy both Steven's articles and the Anticraft's quarterly issues. My inbox had a new issue of PW this morning, with a surprising title - "In Memoriam: Steven Wells".
I didn't know him personally, or even as a writer for very long, but I really enjoyed his cynicism and sarcasm, so I spent a good portion of the morning learning about Steven Wells and his battle with cancer, and I think that it's a story that would touch all but his most vehement haters. Sure, the guy was abrasive, insulting, and often rude- but he was also honest, and his story is frightening and touching and just made me sad that he had to go now, when I was just becoming a fan.
Farrah Fawcett was before my time, Ed McMahon has always been old to me, and I was never a fan of Michael Jackson (or Billy Mays, for that matter), so other than the surprise of how close together their deaths happened, I haven't been saddened or personally affected by them - but I will sorely miss Steven's wit showing up in my inbox every week.

Wednesday, April 22, 2009

Happy Earth Day!

Earth Day is such an important holiday, in my oh-so-humble opinion, and, as I just learned, is also the 3rd 'craftiest' holiday after Christmas and Halloween. It must be from all those milk-carton bird feeders and soda bottle maracas, right?
I feel terrible that I have not been very crafty lately... Christmas seems to have sapped all of my creativity for the last few months, and I am just now starting to get the urge to make things again, which I've been trying to channel that into finishing up some (previously put-on-hold-indefinitely) projects around the house, cooking, and starting a garden with the kids.
This doesn't leave a lot of time for doing much knitting, or for much crocheting either. I've started a couple of things, but haven't had any motivation to finish anything. :(
It's really a shame, because I lucked into some amazing yarns on Freecycle that have been calling my name for the last two months, but I've felt so guilty about all of my UFO's that I haven't dared to start anything new with them. Siiiggghhh.....
I am going to knit a couple of bags to hold the wheels and such for the Heelys that DH's mom bought for Thing 1 and Thing 2, though, which should be a gratifying, quick project. In the meantime, here are a few pictures of past accomplishments for my imaginary audience's viewing pleasure.


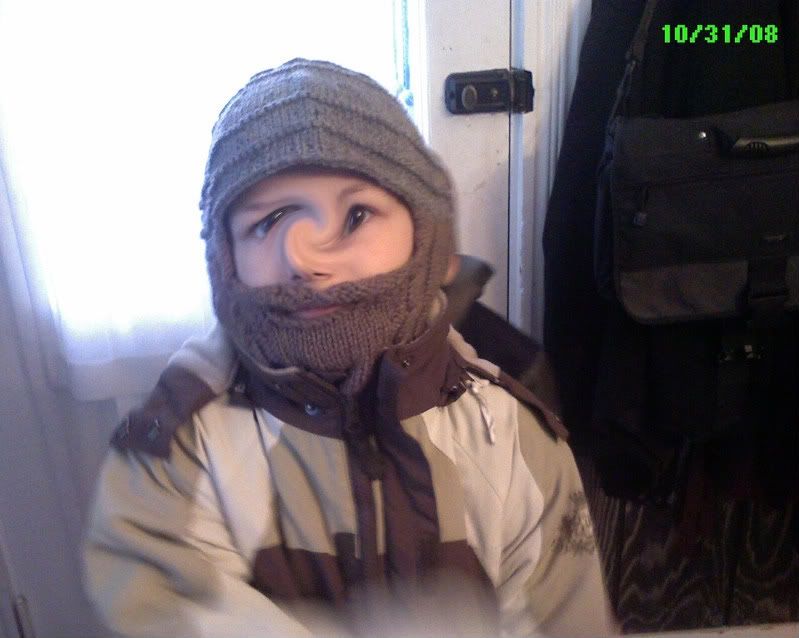
This is the bearded hat I made for Thing 1 for crazy hat day, aka Halloween. I had to talk him into wanting it, but now he loves it.


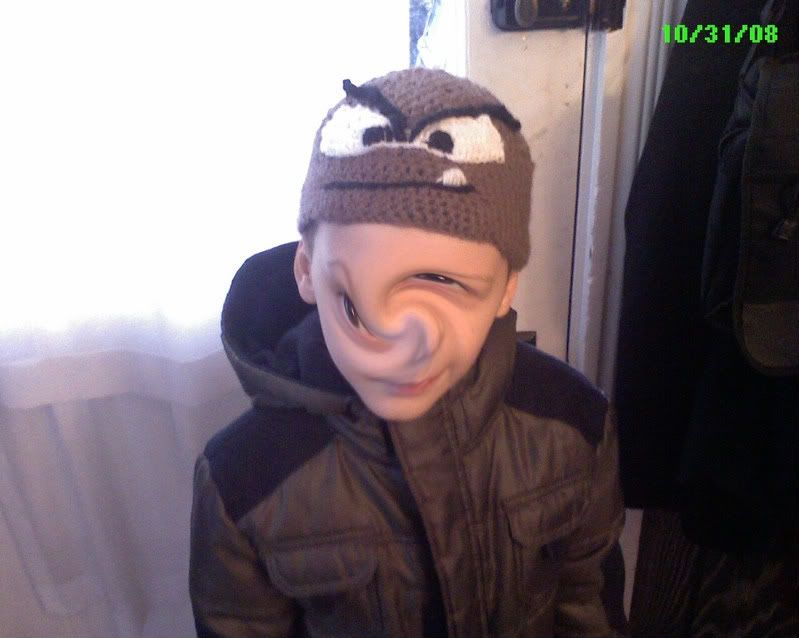
And, also for crazy hat day, this one was finished as the kids were eating breakfast that morning, a crocheted Goomba hat for Thing 2; he loves all things Super Mario. It's a little too small for him, but he wears it anyway. What a kid.
Hopefully, I will have some more stuff to show off soon - not my house projects, though... I forgot to take pictures. Bad blogger, no biscuit....

Tuesday, November 04, 2008

Trinity's Top


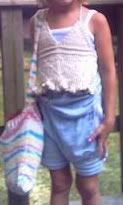
OK, I made this for my niece (and wrote the pattern) about 3 years ago, so pleasepleaseplease, imaginary readers, excuse the terrible pattern writing. etc. The size is about a 5t. I think it only used 2 balls of Sugar n Cream. If you find any errors or have suggestions, please feel free to comment below. Thanks.
eta: Trinity is super petite, so these sizes probably run small.

Trinity’s Top
Size 3T (4T,5T)
Materials:US7 straight or circular needles
Size H crochet hook
1 (2, 2) balls Lily Sugar n Cream worsted weight yarn -100% cotton (I used ecru)

Gauge:5st=1 in, 6rows=1 in

Notes: all inc are k in front and back of st. YIF is slip sts with “yarn in front” - Hold it there a little loosely, it will tighten up quite a bit when you make the bows.
The top that I made was actually a little shorter than I had intended, if you want to make it longer, add a patt repeat (or half a repeat - only 5 rows) to the bottom before BO - but I suggest having another ball of yarn handy just in case you need it.

Bodice-3T
Cast on 5 st
Row 1: k2, p1, k2
Row 2: k2, inc next st, k2 - 6 st
Row 3: k2, p2, k2
Row 4: k2, inc next 2 st, k2 - 8 st
Row 5: k2, p4, k2
Row 6: k2, inc next st, k2, inc next st, k2- 10 st
Row 7: k2, p6, k2
Bodice -4T( 5T) CO 8(10) st.
Row 1: k2, p4(6), k2
Row2: k2, inc in 1st st, k 2(4), inc next st, k2 - 10(12)st
Row 3: k2, p6 ( 8 ), k2
Row 4: k2, inc next st, k4(6), inc next st, k2 - 12(14) st

By now, you should have a small area of stockinette st and an emerging garter st border. All WS (odd numbered) rows should be worked as *K2, p (#of st to garter stitch edge), K2*. All RS (even numbered) rows should knit all st, increasing the third and third from last st, until you have 22 (24, 26) st on your needle. BO.

Make another triangle in the same manner as above. When you have finished the second triangle, cast on 5 st, then pick up 40 st spaced evenly across the bottom of both triangles on the RS. CO another 5 st. Turn to the WS, and begin waist band.

Waist band
Row 1: p across (wrong side)
Row 2: k across
Row 3: k across
Row 4: k across
Row 5: p across
Row 6: k across
Row 7: k across
Row 8: k across

Bottom
There are 50st on your needle now. The first and last 5 will be worked in garter st. So -
St Pattern is a variation of little butterfly worked in multiples of 10 over 10 rows, and will be worked over 40 sts, 20 rows

Row 1: k10,*sl 5 WYIF, k5*, repeat from * to last 5,k5
Row 2: k5, Purl across until last 5. K5.
Row 3: Rep row 1
Row 4: Rep row 2
Row 5: k5, [k7, insert tip of needle under both yif’s, k 1- being careful to draw st around yif’s, K2], repeat across until last 5st, k5

Row 6: K5, *sl 5 wyif, k5*, repeat from * to last 5, k5.
Row 7: K5, Purl until last 5 ,st, k5.
Row 8: Rep row 6
Row 9: rep row 7
Row 10: K5[K2, insert tip of needle under yif’s, k1, making sure to draw st around yif’s, k7], repeat until last 5, k5.
Work pattern two times total (3 times for a longer top) , finish with picot bind-off below.

Finishing :
Picot bind off (thanks to Marnie MacLean for showing me how!)
This will create the ruffle at the bottom, just do a regular bind off if you don’t want the ruffle

K2, pass 1st k st over 2nd k st, *place remaining st back on right needle, CO3, BO4, k1, pass st already on needle over new st*, rep from * until only 1 st is on needle, cut yarn, pull through remaining st, weave in tail.

Straps: Make one at the top of each bodice triangle and at either end of waist band

pick up 5 st.
Row 1: k all
Row 2: k2tog in back of st, k1, k2tog
Row 3: sl1, k 1, psso, sl last st, psso
With crochet hook, pick up last st on needle and chain st for app 6-8 in. Cut yarn, pull through last st tightly. Weave in all ends, block.

Give to your favorite little girl, and enjoy!

Wednesday, September 03, 2008

Raving About Ravelry

Seriously, how cool is this site?
I resisted the lemming-like urge to join the first time I heard about it, for longer than I thought possible. Eventually, though, I followed a pattern link through to Ravelry.com and was denied access because I wasn't a member. So, I bit back my pride and applied for an invitation, and joined. Big surprise, I love it!
It is any crafter's heaven. The only thing that comes close to being half as cool is Etsy - which I have to avoid like the plague because it is a time-suck of epic proportions! I could easily spend a whole day doing nothing but looking at Etsy and Ravelry... and who said computers were supposed to make our lives easier??
Anyway, Ravelry has inspired me to try to organize my knitting, yarn and various projects, much to my husband's delight. He has quietly and kindly lived with random balls of yarn, needles, hooks, and UFO's floating around the house and cluttering up the side tables, and has never once been mean about my endless need to create and my contradictory inability to complete any projects. I am tidying up tables, tallying and inventorying and making excel spreadsheets... he's beside himself.
The only downside to Ravelry? I now have a knitting queue I could not possibly work my way through in this lifetime. And that's not even with all the patterns I want to knit, just the ones I think I could actually find the time, patience, and yarn for. If only all my problems were like this, life would be grand.
That's all the time I can spare for you, blog, I have Ravelry business to attend to!

Thursday, February 22, 2007

Hunter's Itty Bitty Baby Socks


Hunter's Itty Bitty Baby Socks


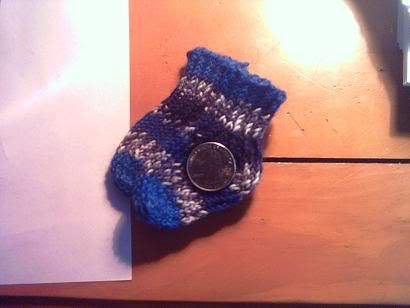
These are socks that I made for my new nephew. Because they are so small, the heel and gusset are worked together in a unique way.

Materials :
Magic Stripes sock yarn (color Sea Blue Stripes)
4 size US3 double pointed needles

Cast on 24 sts as follows :
needle #1 - 12 st
needle #2- 6 st
needle #3- 6st

Cuff:
In k1, p1 rib, work 10 rounds, app 1 1/2 inches
Turn.
Begin Heel Flap
Row 1: sl 1, p1 across needles 3 and 2 - 12 st. Turn
Row 2: sl 1, k1 across - 12 st. Turn
Repeat Rows twice, ending on a RS row.

Begin Gusset/Heel Shaping
With Needle #3, pick up 5 st along edge of heel flap- 11 st on Needle 3 k1, p1 across Needle#1, pick up 5 st along heel flap and knit Needle 2 - 11 st on Needle 2. Knit across Needle 3.

Knit one round, knitting into the back of picked up stitches on needles 2 and 3.
K across needle 1 and 2.
On needle 3, k3, k2tog through the back loop (tbl), k1, turn
sl 1, p7, p2tog, p1, turn
sl 1, k9, k2tog tbl, k to end of needle - 9 st on needle 3
k across needle 1
on needle 2, k4, k2tog, k4 - 9 st on needle 2
k across needle 3 and 1.
on needle 2, k1, k2tog, k6
on needle 3, k6, k2tog tbl, k1
knit one round
next round-
#1 - k
#2 - k1, k2tog, k5
#3- k5, k2tog tbl, k1
knit one round
next round-
#1-knit
#2- k1, k2tog, k4 - 6 st
#3- k4, k2tog tbl, k1 - 6 st

Body of sock, and toe shaping-
k next 7 rounds
next round -
#1- k1, k2tog, k across to last 3 st, k2tog tbl, k1 - 10 st on needle 1
slip stiches on needle 3 to needle 2 - 12 st on needle 2
#2- k1, k2tog tbl, kacross to last 3 st, k2tog, k1 - 10 st on needle 2
k one round
Continue decreasing in this manner - remembering to knit one round between decrease rounds - until there are 8 st on each needle. Knit one round.
To finish toe -
Cut yarn and graft toe using the Kitchener stitch. I prefer this method, but I know some people don't like to graft, so here are some alternate finishes-
Work one extra decrease round, so that 6 st remain on each needle. Knit one more round. Cut yarn, thread onto a tapestry needle, draw through remaining stitches on needles and pull tight. Weave in ends.
Or, finish with a three needle bind off.

If you find any problems or mistakes in this pattern, please comment!!